

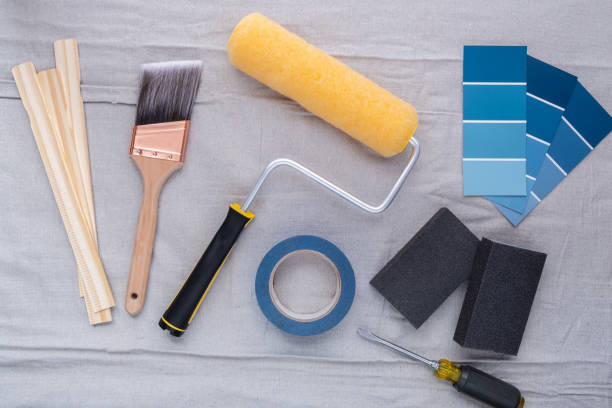
Small surfaces are easy to overlook when painting or doing repair work around the house. A wooden shelf, metal bracket, window frame, or little decorative item might not seem like a big job, but the finish can go wrong pretty quickly if you rush it. Using the right materials makes a difference, and even cheap chip brushes can do a decent job when you choose the right type for the coating. The trick is knowing how to prepare the surface, apply the product without leaving a mess, and give it enough time to cure. It isn’t complicated, really, but a few small mistakes can leave you sanding everything down and starting over.
1. Start With Proper Surface Preparation
Before opening a can of sealant or protective coating, take a minute to inspect what you’re working on. Dust, grease, loose paint, and old coating residue can stop a new layer from sticking properly. Wipe the surface with a suitable cleaner, then let it dry completely. If you’re working with wood, lightly sand rough patches and remove the dust with a clean cloth. Metal may need rust removal or a suitable primer, depending on its condition. Plastic can be trickier because some coatings won’t bond to it without special preparation. Read the product instructions first. Skipping these steps saves a few minutes, maybe, but it often creates more work later.
2. Choose a Sealant That Matches the Material
Not every protective coating works on every surface. Wood sealers help limit moisture absorption, while clear varnishes can provide a tougher finish for furniture and decorative pieces. Metal coatings may protect against rust, and masonry sealants are made for porous materials such as concrete or brick. There’s no single product that does everything well. Think about where the item will be used, too. Something kept indoors has different needs from a garden fixture exposed to rain and sunlight. Check whether the coating is suitable for the material and the conditions it will face. If the manufacturer recommends a primer, use one. Trying to save money by skipping a necessary product can turn into an expensive mistake.
3. Pick the Right Brush for Detailed Work
Small surfaces often have corners, narrow edges, grooves, and awkward shapes that larger tools struggle to reach. A brush gives you more control in these spots, especially when applying sealant around joints or coating the edges of a wooden object. Affordable brushes can be useful for basic jobs, provided the bristles are secure and suitable for the product. Loose bristles stuck in a fresh finish are annoying, and removing them without leaving marks isn’t always easy. Before starting, check the brush for shedding and remove any loose hairs. Use a smaller brush for tight corners and a wider one for flat sections. Don’t overload it with coating, either. A little product at a time is easier to manage than a dripping brush and a puddle on the workbench.
4. Apply Thin Coats Instead of One Heavy Layer
Here’s where patience comes in. It can be tempting to cover the whole surface in one thick coat and call it done, especially when the item is small. But heavy application often leads to drips, sticky patches, uneven coverage, or a finish that takes far too long to dry. Dip only part of the brush into the product, then gently remove excess material against the inside edge of the container if the label permits. Spread the coating with steady strokes, following the grain when working on wood. Pay attention to corners because liquid tends to collect there. If you notice a run, smooth it out while the coating is still workable. Let the first layer dry according to the manufacturer’s directions before applying another one. More coating isn’t automatically better protection.
5. Work Carefully Around Edges and Tight Corners
Edges deserve a little extra attention because they can absorb more product or end up with uneven coverage. On wooden surfaces, exposed end grain may soak up sealant faster than the flatter sections. Apply the coating evenly, allowing it to penetrate as directed, and avoid leaving thick pools around joints. For small metal components, make sure the product reaches the corners without covering moving parts or threaded sections that need to remain clear. If you’re sealing a small tabletop or shelf, inspect the underside and edges as well. These areas are easy to miss when you’re focused on the visible face. Turn the item carefully if necessary, but don’t handle freshly coated sections with bare hands. Fingerprints can leave marks that are difficult to remove once the finish starts setting.
6. Use Rollers When the Surface Is Flat
Brushes aren’t always the best choice for every small project. A roller can spread certain paints, sealers, and compatible protective coatings across flat surfaces with fewer visible brush marks. A 4 inch mini paint roller is useful for small cabinet panels, narrow shelves, doors, and other compact areas where a full-size roller feels clumsy. Choose a roller cover that matches the coating and the finish you’re after. Smooth surfaces generally need a shorter nap, while slightly textured materials may require something thicker. Rollers can also help maintain more consistent coverage across a wider flat section, although corners will still need a brush. Check the product label before using a roller, since some sealants are too thick or specifically designed for brush application.
7. Allow Enough Time for Drying and Curing
Drying and curing aren’t quite the same thing. A surface might feel dry to the touch but still be too soft to handle or expose to moisture. Temperature, humidity, ventilation, and coating thickness all affect how quickly the finish hardens. Follow the stated drying times rather than guessing based on appearance. Keep the item in a clean, well-ventilated area where dust won’t settle onto the wet coating. If another layer is needed, respect the recommended recoat window. Some products require light sanding between coats, while others don’t. Once the final coat is applied, give it the full curing time before placing heavy objects on it or putting it back into regular use. Rushing this stage can ruin an otherwise decent job.
Conclusion: Good Results Come From Small Details
Applying sealants and protective coatings to small surfaces doesn’t require a professional workshop or expensive equipment. It does require a bit of preparation and some common sense. Clean the material, choose a compatible product, apply thin coats, and pay attention to the edges. Use brushes where control matters and rollers where they make coverage easier. Most importantly, don’t rush the drying process just because the project looks finished. A little care at each stage helps the coating last longer and gives the surface a cleaner appearance. Small jobs are often where sloppy habits show up, but they’re also a good place to get the basics right.