


Embarking on a home baking journey begins with choosing the best bread making kits. These kits typically include everything a beginner or experienced baker needs—mixing bowls, measuring tools, scrapers, dough whisks, and proofing baskets. The true benefit comes from having all the tools in one bundle, which makes things easier and saves time while making sure everything is the same. The best kits are created from safe, high-quality materials and come with easy-to-follow instructions or recipes. This makes it much easier to learn. If you have a good kit on hand, you won’t have to go through the trial-and-error phase when you make sourdough or sandwich loaves. This will help you enjoy baking more. It’s also easy to use, which helps you get better at creating bread by learning how different tools work at different stages. An all-in-one method also takes the uncertainty out of baking and makes your style look like that of a pro. You’ll be ready to make your first loaf straight away if you obtain a whole kit. Each batch will make you feel more sure of yourself. This small tweak will make a tremendous difference in any kitchen.
Knowing which elements make a difference
The quality of the ingredients you use has a major impact on how good your bread is. If you want to make sure the gluten network is strong, which is vital for structure, use flour that isn’t bleached and has a lot of protein. Yeast works better with filtered water that doesn’t contain chlorine in it, and natural sea salt adds fermentation flavor and control. The most vital parts of your dough are the active dry yeast or sourdough starters. To obtain the finest rise and taste, you need to handle them right. Adding sweeteners like honey or molasses can also modify the color and texture of the crust in small ways. It’s important to store materials properly so they stay strong. If you store flour and yeast in sealed containers and a cold, dry cupboard, they will keep longer. When you grasp how each aspect of your loaf influences the final outcome, baking turns from being a chore to being a delightful, rewarding activity. Your meal will taste better, be more consistent, and be more satisfying if you take the time to choose and care for your ingredients.
The Role of Fermentation in Bread Making
Fermentation is what makes bread rise. It’s the way that flour and water come together to form dough that rises and has a lot of flavor and character. During fermentation, yeast eats the carbohydrates in the flour and turns them into carbon dioxide and ethanol. This not only makes your bread rise, but it also brings out the rich flavors that you expect from artisan bread. Fermenting things right takes time and care. The temperature, how much water is in it, and how long it ferments all have an effect on the end result. Putting the dough in the fridge to ferment slowly and coldly might make the flavor stronger and keep it from rising too much. At this time, you need to watch the dough closely. Check for bubbles, a rise in volume, and stretchiness. Bread that has been over-fermented may taste sour and crumble apart, whereas bread that has been under-fermented may have a dense crumb that hasn’t fully matured. The secret to attaining professional results at home is knowing how to keep this delicate equilibrium. You need to know how to ferment if you want to make bread, whether you use fast yeast or a wild sourdough starter.
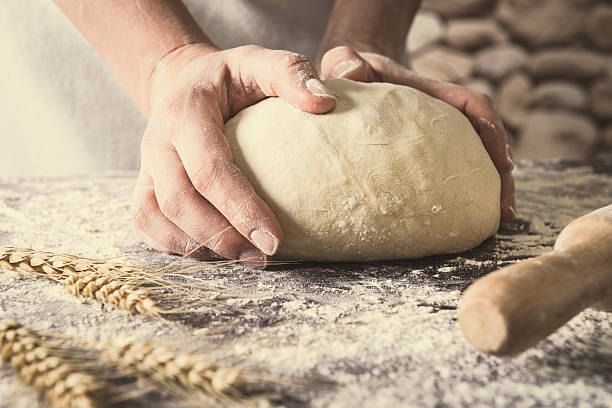
How to Knead Dough to Make It Soft and Strong
Kneading is how you shape your dough with your hands. It pushes on the gluten strands, which allows them form a strong, elastic network that traps gas and makes your bread rise. You can do it in a lot of different methods, such as by hand on a floured surface, with a stand mixer, or with stretch-and-fold techniques. Each procedure changes the final texture of the dough. When you knead the dough right, it will be smooth and a bit sticky, and it will bounce back when you touch it. It will be overly tight and hard to form if you knead it too much. It will be sticky and weak if you don’t knead it enough. It’s important to let the dough rest every so often so that the gluten may relax and make it simpler to deal with. Watch how the dough changes as you work with it. It should go from a rough mess to a gentle ball. The more you knead the dough, the more you learn about its language. You will learn how to tell when bread is ready via experience, which will make sure that each loaf has the right taste, crumb, and strength.
Things That Make Baking Bread More Fun
You can prepare bread with just a few simple instruments, but utilizing the right ones will make the procedure and the bread better. Bench scrapers are helpful for keeping sticky dough in check and cleaning up work surfaces. A lame, or bread scoring tool, enables you create controlled and attractive cuts that give your loaves their characteristic shape and help them rise in the oven. To make sure that the fermentation and baking are as wonderful as they can be, it’s very vital to keep an eye on the temperatures of the dough and the oven. A dough whisk is the finest way to combine without making the dough too tough. These tools are easy to use, but they provide you control and accuracy. Over time, their utility becomes necessary. They make your baking less messy, more even, and give it a homemade look. Buying proper tools for your art will make baking more fun, easier, and more rewarding. These tools aren’t just nice to have for folks who are serious about their bread; they’re vital to make the ideal loaf.
How to Get Good at Proofing Bread
When the dough rises and sits after being kneaded, it gets bigger and tastes better. This step is quite important, therefore you need to do it right. If you don’t prove the dough enough, it won’t rise appropriately, and if you do, it could fall apart. It is better to prove in a warm and humid location, such between 75 and 85 degrees Fahrenheit. This keeps the yeast alive. Putting a wet cloth over the dough or putting it in a container that is closed will help it stay moist. Some bakers undergo a second proving termed the final rise after shaping the dough. This gives it its final shape and gets it ready to bake. It takes time to proof, but it’s apparent that a well-proofed dough will hold its shape and slowly spring back when you press it gently. This step is very critical to make sure your bread is light, fluffy, and tasty. It’s a change that needs to be made slowly and quietly. It makes the difference between a great loaf and an exceptional one.
Why it’s vital to score dough before baking
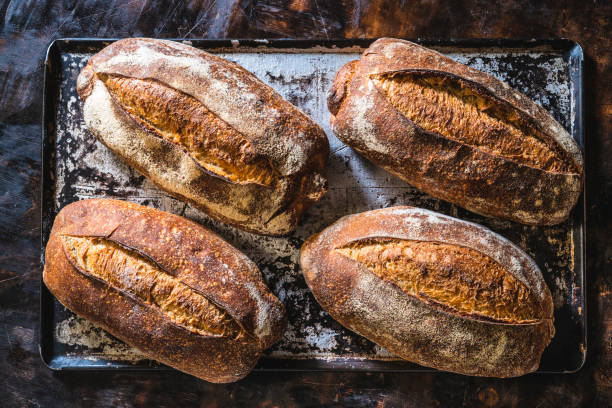
Scoring the dough is a necessary step in making bread that also looks nice. It implies making shallow cuts on the surface right before baking. These cuts stop the dough from getting too big in the oven, which may make it burst at any point. The score’s depth, orientation, and position all change how your loaf will look and form when it’s done. Traditional patterns include single slashes, crisscrosses, and artistic flourishes. When you use a sharp knife or lame to cut the bread, it stays clean, which helps it rise in the oven. Scoring is another opportunity to be creative and make each loaf a unique work of art. Not only does it look good, but it’s also a skill that gets better with practice. When you score bread correctly, the rise, texture, and crumb are all great, especially in sourdough and rustic-style loaves. You may also learn more about how your dough is fermenting by watching how it reacts to scoring. This will let you have more say over how your baked goods turn out.
How crucial the steam and heat in the oven are
The way you set up your oven can make or break the bread you prepare. Preheating is particularly crucial because your oven needs to be hot enough for “oven spring,” which is the last rise that happens in the first few minutes of baking. Most artisan breads bake best when the oven is between 425°F and 475°F. When you put steam in the oven, it helps the bread rise all the way and makes the crust thin and crunchy. You can do this by putting a pan of water on the bottom of the oven or by spraying the walls with a spray bottle. Some bakers don’t need any extra support to trap steam in Dutch ovens. To make sure the loaf is properly baked, check the internal temperature, which should be around 200°F when it’s done. If you use the proper amount of steam and bake for the right amount of time, a well-calibrated oven will give you professional results: a golden crust, airy crumb, and rich taste in every slice.
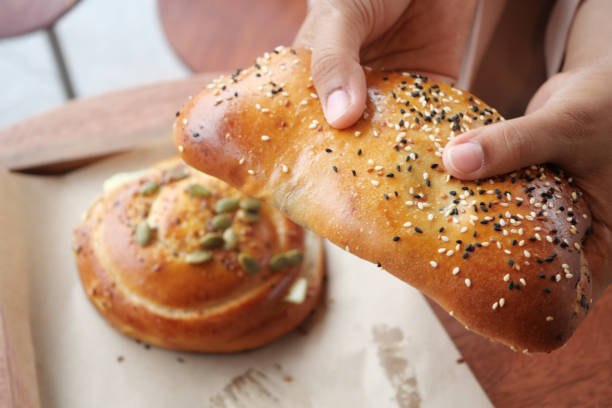
How to cool and keep bread Cooling is just as important as baking. The heat that is still there makes the bread keep cooking after you take it out of the oven. If you let it cool on a wire rack for at least an hour, it will protect the crust from turning mushy and make the crumb solid. The slices can be sticky and uneven if you cut them too quickly. When the bread cools down, putting it in the appropriate spot helps it stay fresh. Put your artisan loaves in a paper bag, linen cloth, or bread box to keep them fresh. Plastic holds moisture in and makes the crust spongy, so don’t place them in plastic unless you’re freezing them. Freezing extra loaves is a great way to keep them fresh. You can toast each piece if you cut it up before freezing it. Don’t put it in the fridge; it will go bad faster. If you take care of bread after baking it, it will last longer, taste better, and have more uses. Proper storage and cooling Make sure that your hard work lasts longer and tastes better, whether you eat it fresh, toasted, or as sandwich bread.
Different Types of Bread to Make
There are a lot of various kinds of bread in the world. There are many different kinds of bread, and each one has its unique taste and feel. For example, baguettes are crusty, ciabatta is light, rye is dense, and sourdough is tangy. You can change the ingredients and processes as you test new varieties. For example, ciabatta dough needs to be wetter and kneaded by stretching and folding, while rye bread dough needs less gluten and more time to rise. Focaccia is a savory bread that employs dough with a lot of oil and creative toppings instead of conventional bread. Adding healthy grains or seeds to baked items makes them taste better and healthier. You learn a lot along the way because each type needs different proofing and bake times. When you learn new talents, you become more adaptable and sure of yourself. You’ll learn how the amount of water, the shape of the dough, and the baking time all change the final product. Every new loaf of bread has a story and a cultural background that makes it more fun to cook in your kitchen. The more you know about how to make bread, the more fun it is. Every day, making bread is a terrific method to achieve this.
Making Bread a Daily Habit
The process requires concentration and patience, from kneading the dough to waiting for it to rise and then baking it. If you make time for it on a regular basis, baking could become a fun and soothing method to escape from it all. The smell that permeates your home, the feel of the dough, and the sound of the crust splitting all make you more aware of your senses. The more you bake, the more you’ll learn about your own style, pace, and tastes. You could make it a weekend thing, bake for special occasions, or just use it to spend time with family and friends. You also get better at baking with each loaf, which makes you feel good and builds your confidence. Making bread may be more than just a hobby; it can be a delightful part of your life. You are feeding both your home and your soul every time you get up and bake. Do it often, and let it make you happy and inspire you.
Using a bread proofing basket for Better Shape and Texture
One of the most effective tools in any baker’s kitchen is the bread proofing basket, often called a banneton. It’s designed to support the dough during its final rise, allowing it to keep its shape and develop a beautiful, flour-dusted pattern. These baskets help create the structure needed for a successful oven spring and are especially useful for wet or high-hydration doughs that tend to spread out. The coiled ridges also promote airflow, aiding even fermentation and giving the crust a rustic appearance. Before use, it’s important to flour the basket well or use a cloth liner to prevent sticking. After proofing, you gently invert the dough onto your baking surface, and it’s ready for scoring and baking. A good proofing basket adds professionalism to your home baking and helps replicate bakery-style results. For any baker wanting consistency in their loaves, this simple yet essential tool makes a significant difference.
Conclusion
Baking bread at home is an art form enriched by passion, precision, and patience. With the right tools, such as the best bread making kits, and a clear understanding of each step, even novice bakers can produce impressive loaves. Every phase—from kneading and fermentation to scoring and proofing—plays a vital role in crafting that perfect slice. Using dependable tools like a proofing basket ensures your dough gets the structure it needs, elevating both appearance and flavor. Brands like Abioto understand the importance of quality tools in simplifying the process while ensuring artisanal results. As you continue to explore the world of bread baking, let each loaf tell a story of care, creativity, and craftsmanship.